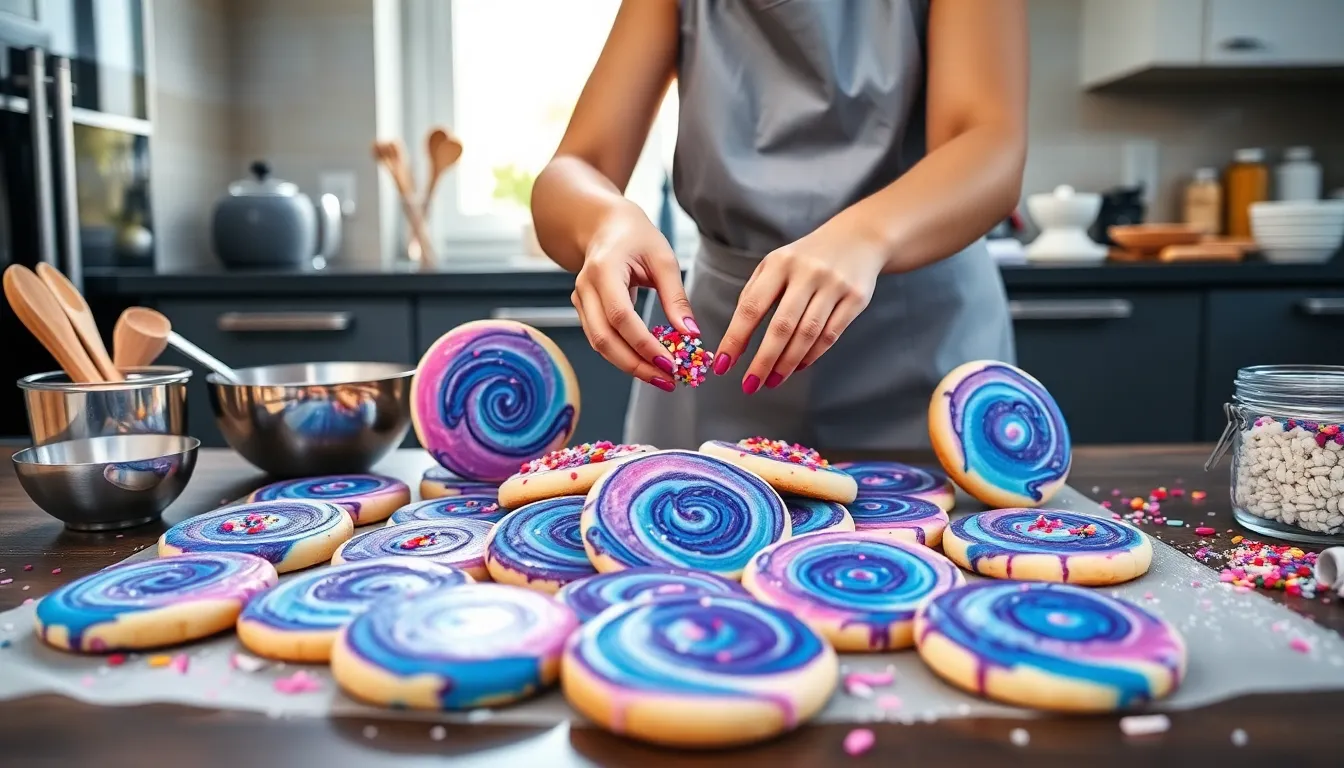
Have you ever wondered what the universe would taste like? Well, it’s about time you find out, thanks to the Flour Power Nebula Cookies. These delightful little gems are not just cookies: they’re a love letter to the cosmos and to your taste buds. Picture this: biting into a soft, gooey cookie that bursts with flavors, colors, and a sprinkle of magic. Whether you’re baking for a special someone or simply indulging your own cravings, these cookies are bound to leave a memorable impression. Let’s jump into the celestial origin of these treats and find out what makes them so extraordinary.
The Origin of Flour Power Cookies
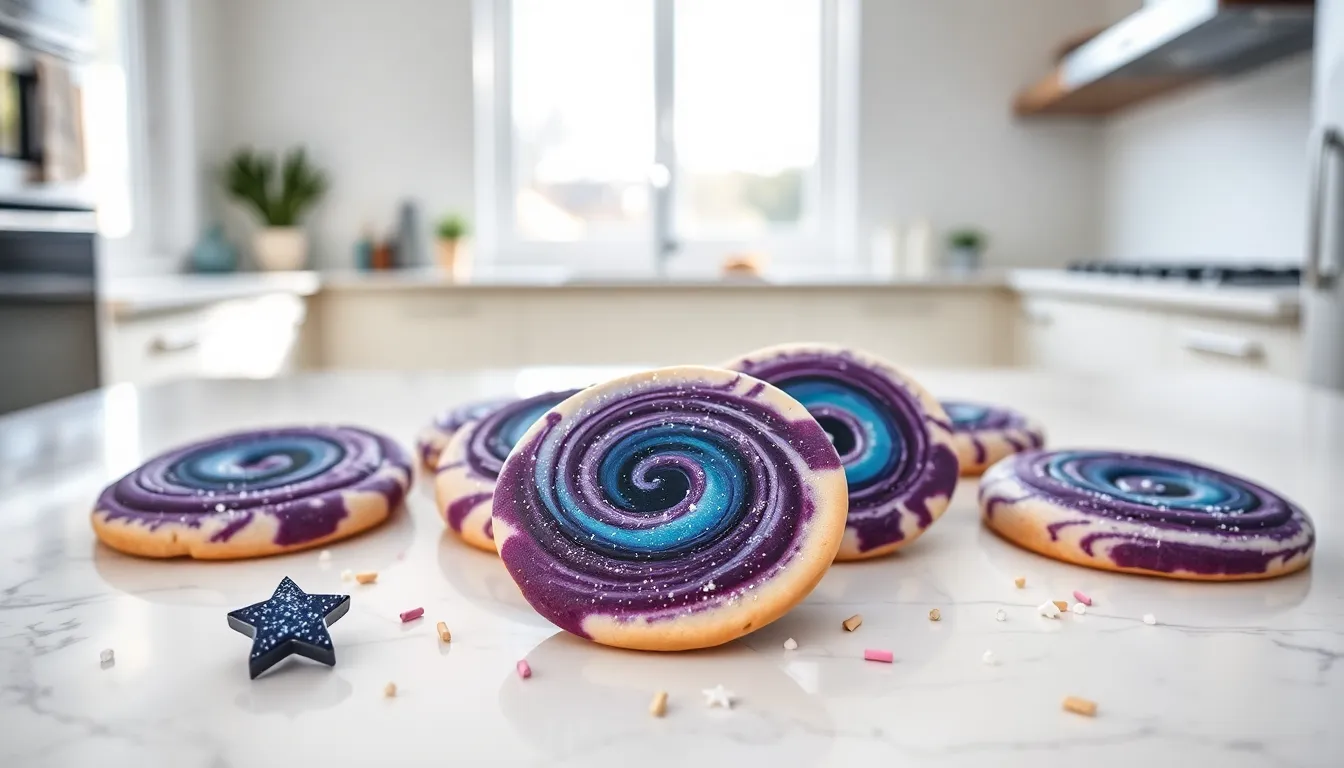
The Flour Power Nebula Cookies can be traced back to an imaginative baker who wanted to create a cookie that captured the essence of the universe. Inspired by the beauty of a nebula, this baker decided to fuse traditional cookie recipes with colorful, cosmic elements. The result was a cookie that not only looks stunning but also tastes heavenly. These cookies symbolize love and creativity, making them the perfect treat for sharing with friends or loved ones. With every bite, you’re not just enjoying a cookie: you’re savoring a piece of art that brings people together.
Ingredients That Make These Cookies Special
What truly sets Flour Power Nebula Cookies apart are their unique ingredients. Start with quality flour, sugar, and butter as your base. But then, the fun begins. A hint of vanilla enhances the flavor, while a splash of food coloring transforms the dough into swirls reminiscent of a galaxy. Add in some edible glitter for that cosmic sparkle, and don’t forget your favorite mix-ins like chocolate chips or nuts. Each ingredient plays a crucial role in creating a cookie that’s not only visually stunning but also bursting with flavor. This combination of textures and tastes captivates anyone lucky enough to bite into one.
Step-by-Step Guide to Baking Flour Power Nebula Cookies
Baking these cookies is as easy as counting stars. Here’s a step-by-step guide to get you started:
- Preheat Your Oven: Set it to 350°F (175°C) so it’s ready for your cookies.
- Shuffle the Dry Ingredients: In a bowl, whisk together flour, baking soda, and a pinch of salt. This helps create a uniform texture.
- Cream the Butter and Sugar: In another bowl, combine your softened butter and sugar. Beat until fluffy for that perfect cookie base.
- Crack in the Eggs: Add the eggs one at a time, mixing well after each addition. This ensures your batter is smooth and rich.
- Introduce Flavor: Stir in your vanilla extract and mix again.
- Combine Everything: Gradually add the dry ingredients to the wet mixture until fully integrated.
- Add Color and Mix-Ins: Divide the dough into parts, add different colors, then gently fold in the edible glitter and your choice of mix-ins.
- Scoop and Shape: Using a cookie scoop, place dough balls on a parchment-lined baking sheet. Don’t forget to space them out.
- Bake: Pop your tray into the oven and bake for about 10-12 minutes, or until the edges are golden.
- Cool and Enjoy: Let them cool for a few minutes on the baking sheet before transferring them to a wire rack. Now, the moment you’ve been waiting for, enjoying those heavenly cookies.
Creative Variations and Adaptations
Once you’ve mastered the classic Flour Power Nebula Cookies, you might feel adventurous. Here are a few creative variations to try:
- Galactic Sprinkles: Swap regular chocolate chips for colorful sprinkles for a funky twist.
- Seasonal Flavors: Add pumpkin spice for the fall or peppermint extract around the holidays.
- Nutty Nebulas: Incorporate crushed nuts like walnuts or pecans for added crunch.
- Vegan Delight: Substitute dairy ingredients with plant-based alternatives. Coconut oil and flaxseed eggs work wonderfully.
These adaptations not only make the cookies unique but also allow bakers to experiment and cater to different dietary preferences.
The Love Behind the Cookies: Personal Stories
Every cookie carries a story, and the Flour Power Nebula Cookies are no exception. Imagine a father, baking these colorful delights with his daughter, sharing stories about the stars and life as they mix the dough. Or a group of friends coming together for a cookie decorating party, creating their own galaxies on each cookie. These cookies represent love, creativity, and connection. They are more than just a treat: they’re a vehicle for memories. Every bite carries nostalgia, encapsulating moments that warm the heart.
Tips for the Perfect Cookie Experience
To ensure you get the best out of your baking experience, keep these tips in mind:
- Room Temperature Ingredients: Make sure your butter and eggs are at room temperature for better blending.
- Don’t Overmix: Mixing too much can lead to tough cookies. Just combine until you see no flour.
- Chill Your Dough: If time allows, chill your dough for 30 minutes to an hour before baking for thicker cookies.
- Experiment with Baking Times: Every oven is different, so keep an eye on the first batch to find your perfect timing. And trust your instincts.
- Share the Love: Nothing enhances the cookie experience like sharing. So, whether you keep them for yourself or give them away, spread the joy.